VITA IMPLANT SOLUTIONS: The implant prosthetic restoration concept
For implant prosthetic crown reconstructions with VITA IMPLANT SOLUTIONS (IS) blanks (VITA Zahnfabrik, Bad Säckingen, Germany), there is a 3-step restoration concept. It begins with the implantation and leads to the final ceramic reconstruction via the temporary restoration for the optimization of the emergence profile. All blanks have an integrated interface to a titanium/adhesive base (e.g., Sirona TiBase, Bensheim, Germany) and enable an efficient restoration. Dr. Andreas Kurbad (Viersen-Dülken, Germany) explains the individual steps in a case report.
1. The patient case
20 years after the endodontic treatment of tooth 46, a 39-year-old patient had recurrent acute complaints. Mesial and distal periapical brightening in the X-ray showed evidence of bone resorption. After a root tip resection did not result in the desired therapeutic success, the tooth should be extracted in a manner that protects the bone. Because of the intact bone below the resection area, the gap was to be provided with an immediate guided implantation.
2. Prosthetic planning
The entire dentition was initially scanned with the CEREC Omnicam, and the crown was then designed and functionally optimized with the CEREC software V 4.4 (Sirona Dental, Bensheim, Germany). A plaster model etched for 46 was used to create an X-ray template. After a bone-protecting extraction, a DVT was created with the X-ray template used. The intraoral scan with crown planning was imported into the image data and virtually implanted with the Galaxis software (Sirona Dental, Bensheim, Germany). The data was used to grind an insert that converted the X-ray template into a drill template through perfect fitting.
3. Gingival shaping
The drilling template made possible a positionally stable implantation with optimal use of the bone. Digital forming was performed with a scan post screwed on. A temporary abutment crown made of VITA CAD-Temp IS could be virtually designed to the exact implant position. The focus was on the formation and maintenance of the gingival structures. Occlusal and approximal interferences were still consistently avoided here for the sake of undisturbed healing. The blank was ground while keeping the interface in mind. After completion, the completed crown was adhesively fixed and integrated on the titanium base.
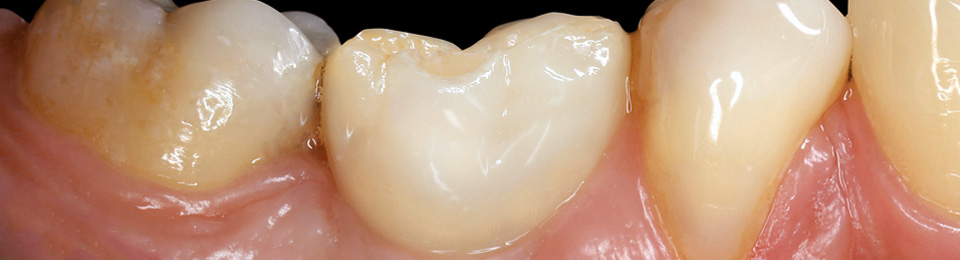
4. Final restoration
An ideal gingival emergence profile appeared after four months of the healing phase. The missing cement joint of the abutment crown contributed to the absence of inflammation. After a new scan, the final abutment crown could be fabricated from "VITA ENAMIC IS". The dentine-like modulus of elasticity of the hybrid ceramic allows for the absorption of the chewing force, providing long-term relief of the bony structures around the implant. After elaboration and individualization, the restoration is harmoniously integrated into the gingival structures and residual dentition. Immediate implantation and VITA IMPLANT SOLUTIONS (IS) have enabled an efficient treatment protocol.
Report 08/16