Excellent depth effect with ceramic restorations

The reproduction of individual characteristics – such as mamelon structures, anomalies and calcifications – is a special challenge if these lie within the depths of the inner tooth structure. In this case, the VITA INTERNO stains (VITA Zahnfabrik, Bad Säckingen, Germany) for the internal characterization of restorations offer a multitude of possibilities. The stains, for example, can be mixed in with veneering materials and provide for more luminance from the depths. In the following case study, CDT Renato Carretti (Zurich, Switzerland) reports on the effective use of these stains.

1. Initial situation

In the present case, a male patient (55 years old) was to have a full ceramic crown made for region 22. The challenge was to bridge the shade differences between the neighboring teeth and to pick up the individual
characteristics of tooth 12. The base shade 3M2 was determined for the restoration. The patient rejected a new restoration for tooth 11.

2. Manufacturing steps

"My first choice for the restoration of anterior teeth are crowns made of VITABLOCS RealLife (VITA Zahnfabrik). The blanks have an integrated 3-D shade gradient and offer a very natural-looking translucence," says CDT Renato Caretti. The crowns were slightly reduced in the first step and rebuilt with VITA VM 9. For color effects from the depths, the VITA INTERNO stains were used. Finally, restorations can still be characterized with VITA AKZENT Plus stains and glazed.

3. Information and tips

When using VITA INTERNO stains, special care must be taken to overlay them with ceramic. As the name suggests, these are stains for internal application. Normally I do not fire them - instead I just do a fixation firing so that they remain in place," reports CDT Renato Caretti. Because of the intensive color effect, the stains should be used very sparingly.

4. Result and conclusion

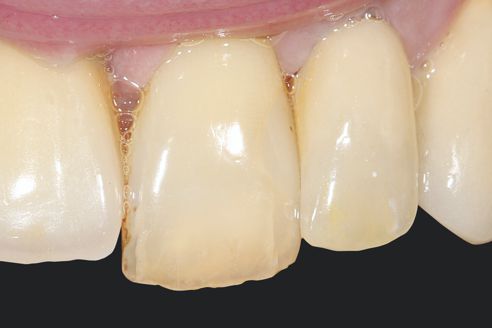
The case documentation shows that what may appear on the model as over-accentuated color play is often just right in the patient's mouth since much of the intraoral effect diminished. The naturally matte luster was achieved by polishing once again manually with pumice after the glaze firing. In the view of the dental technician, the overall result in this case may be assessed as the best possible compromise, and one that meets the patient's wishes.

Report 03/16

CDT Renato Carretti
Zurich, Switzerland
"My first choice for the restoration of anterior teeth are crowns made of VITABLOCS RealLife."
CDT Renato Carretti
Zurich, Switzerland
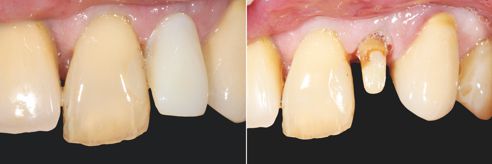
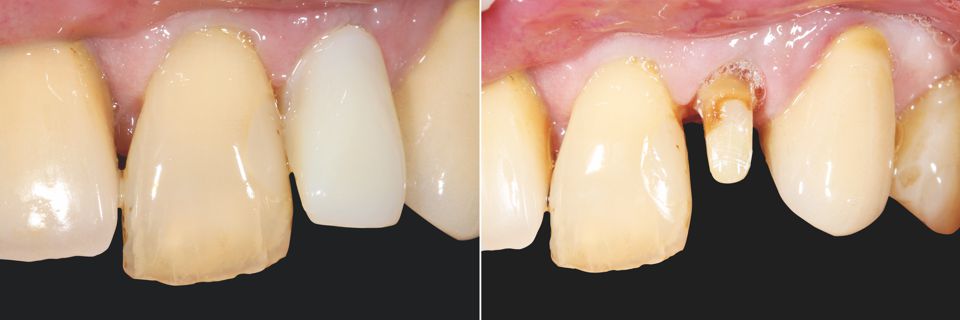
Fig. 1: Initial situation of provisional restoration of tooth 22.
Fig. 2: Exposed and built-up tooth stump.
Fig. 1: Initial situation of provisional restoration of tooth 22.
Fig. 2: Exposed and built-up tooth stump.
Fig. 1: Initial situation of provisional restoration of tooth 22.
Fig. 2: Exposed and built-up tooth stump.
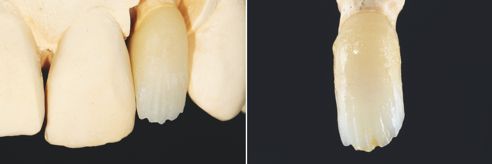
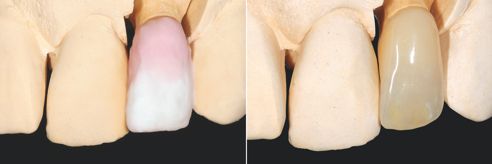
Fig. 3: The CAD/CAM-manufactured and manually reduced crown framework made of VITABLOCS RealLife.
Fig. 4: Cut-back framework characterized with VITA INTERNO (incisal Int03/cervical Int04).
Fig. 3: The CAD/CAM-manufactured and manually reduced crown framework made of VITABLOCS RealLife.
Fig. 4: Cut-back framework characterized with VITA INTERNO (incisal Int03/cervical Int04).
Fig. 3: The CAD/CAM-manufactured and manually reduced crown framework made of VITABLOCS RealLife.
Fig. 4: Cut-back framework characterized with VITA INTERNO (incisal Int03/cervical Int04).
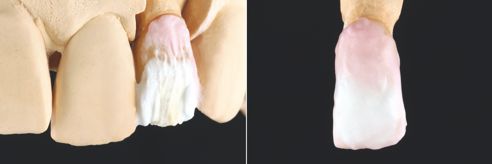
Fig. 5: Mesial and distal, EE9 (bluish translucent) was used for construction, and in the middle, a mixture of Int02 and NT was used.
Fig. 6: A halo effect was achieved in the incisal area with a mixture of BASE DENTINE, NT and Int02.
Fig. 5: Mesial and distal, EE9 (bluish translucent) was used for construction, and in the middle, a mixture of Int02 and NT was used.
Fig. 6: A halo effect was achieved in the incisal area with a mixture of BASE DENTINE, NT and Int02.
Fig. 5: Mesial and distal, EE9 (bluish translucent) was used for construction, and in the middle, a mixture of Int02 and NT was used.
Fig. 6: A halo effect was achieved in the incisal area with a mixture of BASE DENTINE, NT and Int02.
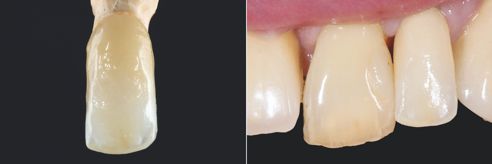
Fig. 7: The result after firing ...
Fig. 8: … and during the try-in in the patient's mouth.
Fig. 7: The result after firing ...
Fig. 8: … and during the try-in in the patient's mouth.
Fig. 7: The result after firing ...
Fig. 8: … and during the try-in in the patient's mouth.
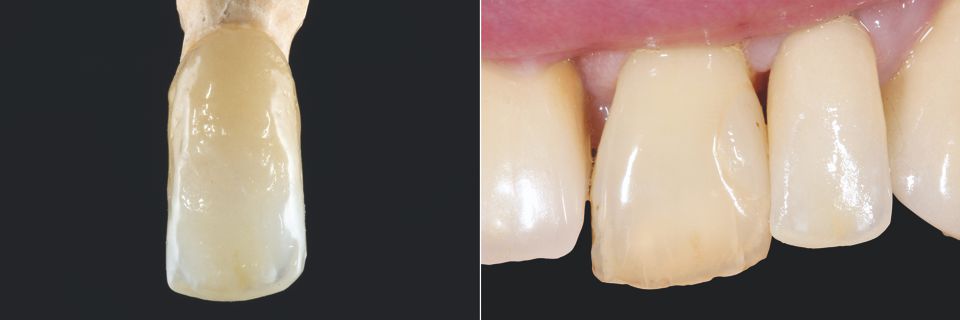
Fig. 9: Increase in color effect by the application of Int04 and Int01.
Fig. 10: After the glaze firing comes manual polishing with pumice to achieve a natural, matte glaze.
Fig. 9: Increase in color effect by the application of Int04 and Int01.
Fig. 10: After the glaze firing comes manual polishing with pumice to achieve a natural, matte glaze.
Fig. 9: Increase in color effect by the application of Int04 and Int01.
Fig. 10: After the glaze firing comes manual polishing with pumice to achieve a natural, matte glaze.
Fig. 11: The result corresponds with the expectations and desires of the patient.
Fig. 11 The result corresponds with the expectations and desires of the patient.
Fig. 11: The result corresponds with the expectations and desires of the patient.